练习三:添加自动化测试
自动化单元测试是敏捷开发中的提升质量最为有效的实践之一,为了能够确保所有的版本都经过自动化测试后才能发布,我们需要对之前创建 生成定义 进行修改,添加自动化测试步骤。
- 打开 PartsUnlimited_masterCI 这个 生成定义
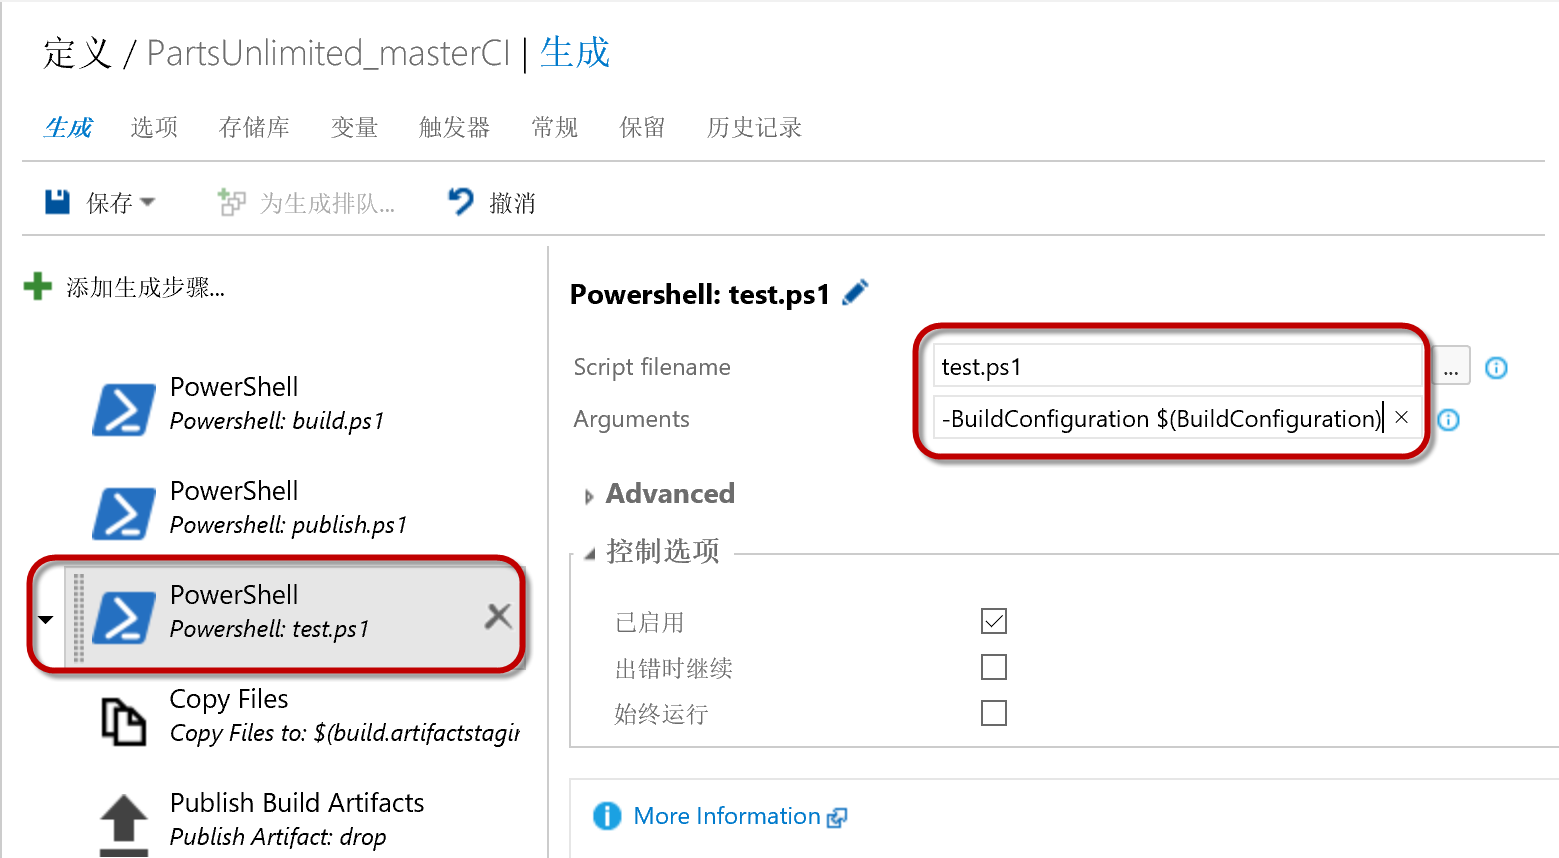
添加一个新的 PowerShell 任务,对其参数进行以下配置
| 参数 | 值 |
|---|---|
| Script filename | test.ps1 |
| Arguments | -BuildConfiguration $(BuildConfiguration) |
test.ps1 这个脚本的内容如下:
[CmdletBinding()]
Param(
    [Parameter(Mandatory=$True)] [string] $BuildConfiguration
)

& scripts/Call-Dnu.ps1 restore .\test
& scripts/Call-Dnu.ps1 build .\test\PartsUnlimited.UnitTests --configuration $BuildConfiguration

# Run tests
& scripts/Call-Dnx.ps1 -p .\test\PartsUnlimited.UnitTests test -xml testresults.xml
如下图:
- 上传测试结果
为了能够在生成结果中看到测试结果,我们在 生成定义 中添加 Publish Test Result 任务
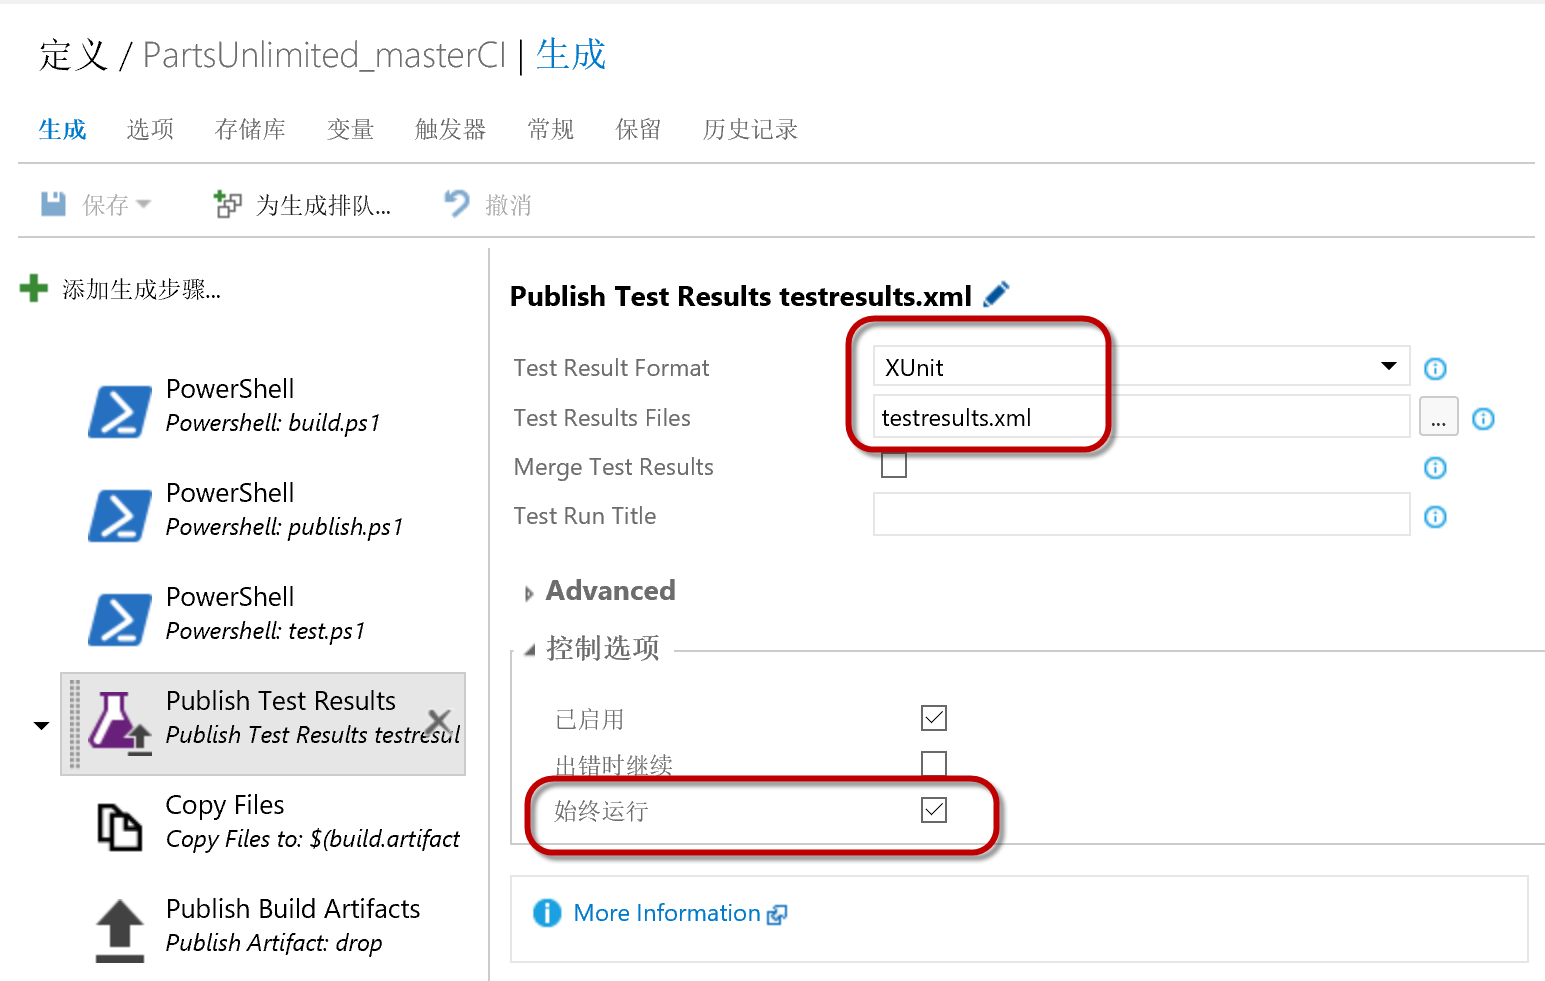
并对其进行以下配置
| 参数 | 值 |
|---|---|
| Test Result Format | XUnit |
| Test Result Files | testresults.xml |
| 始终运行 | 选中 |
注解
请注意在前面的 test.ps1 这个脚本中,我们指定了测试结果文件为 testresults.xml,这里使用同样的文件名。
- 运行生成并查看测试结果
打开运行完成的生成,我们可以看到一下结果
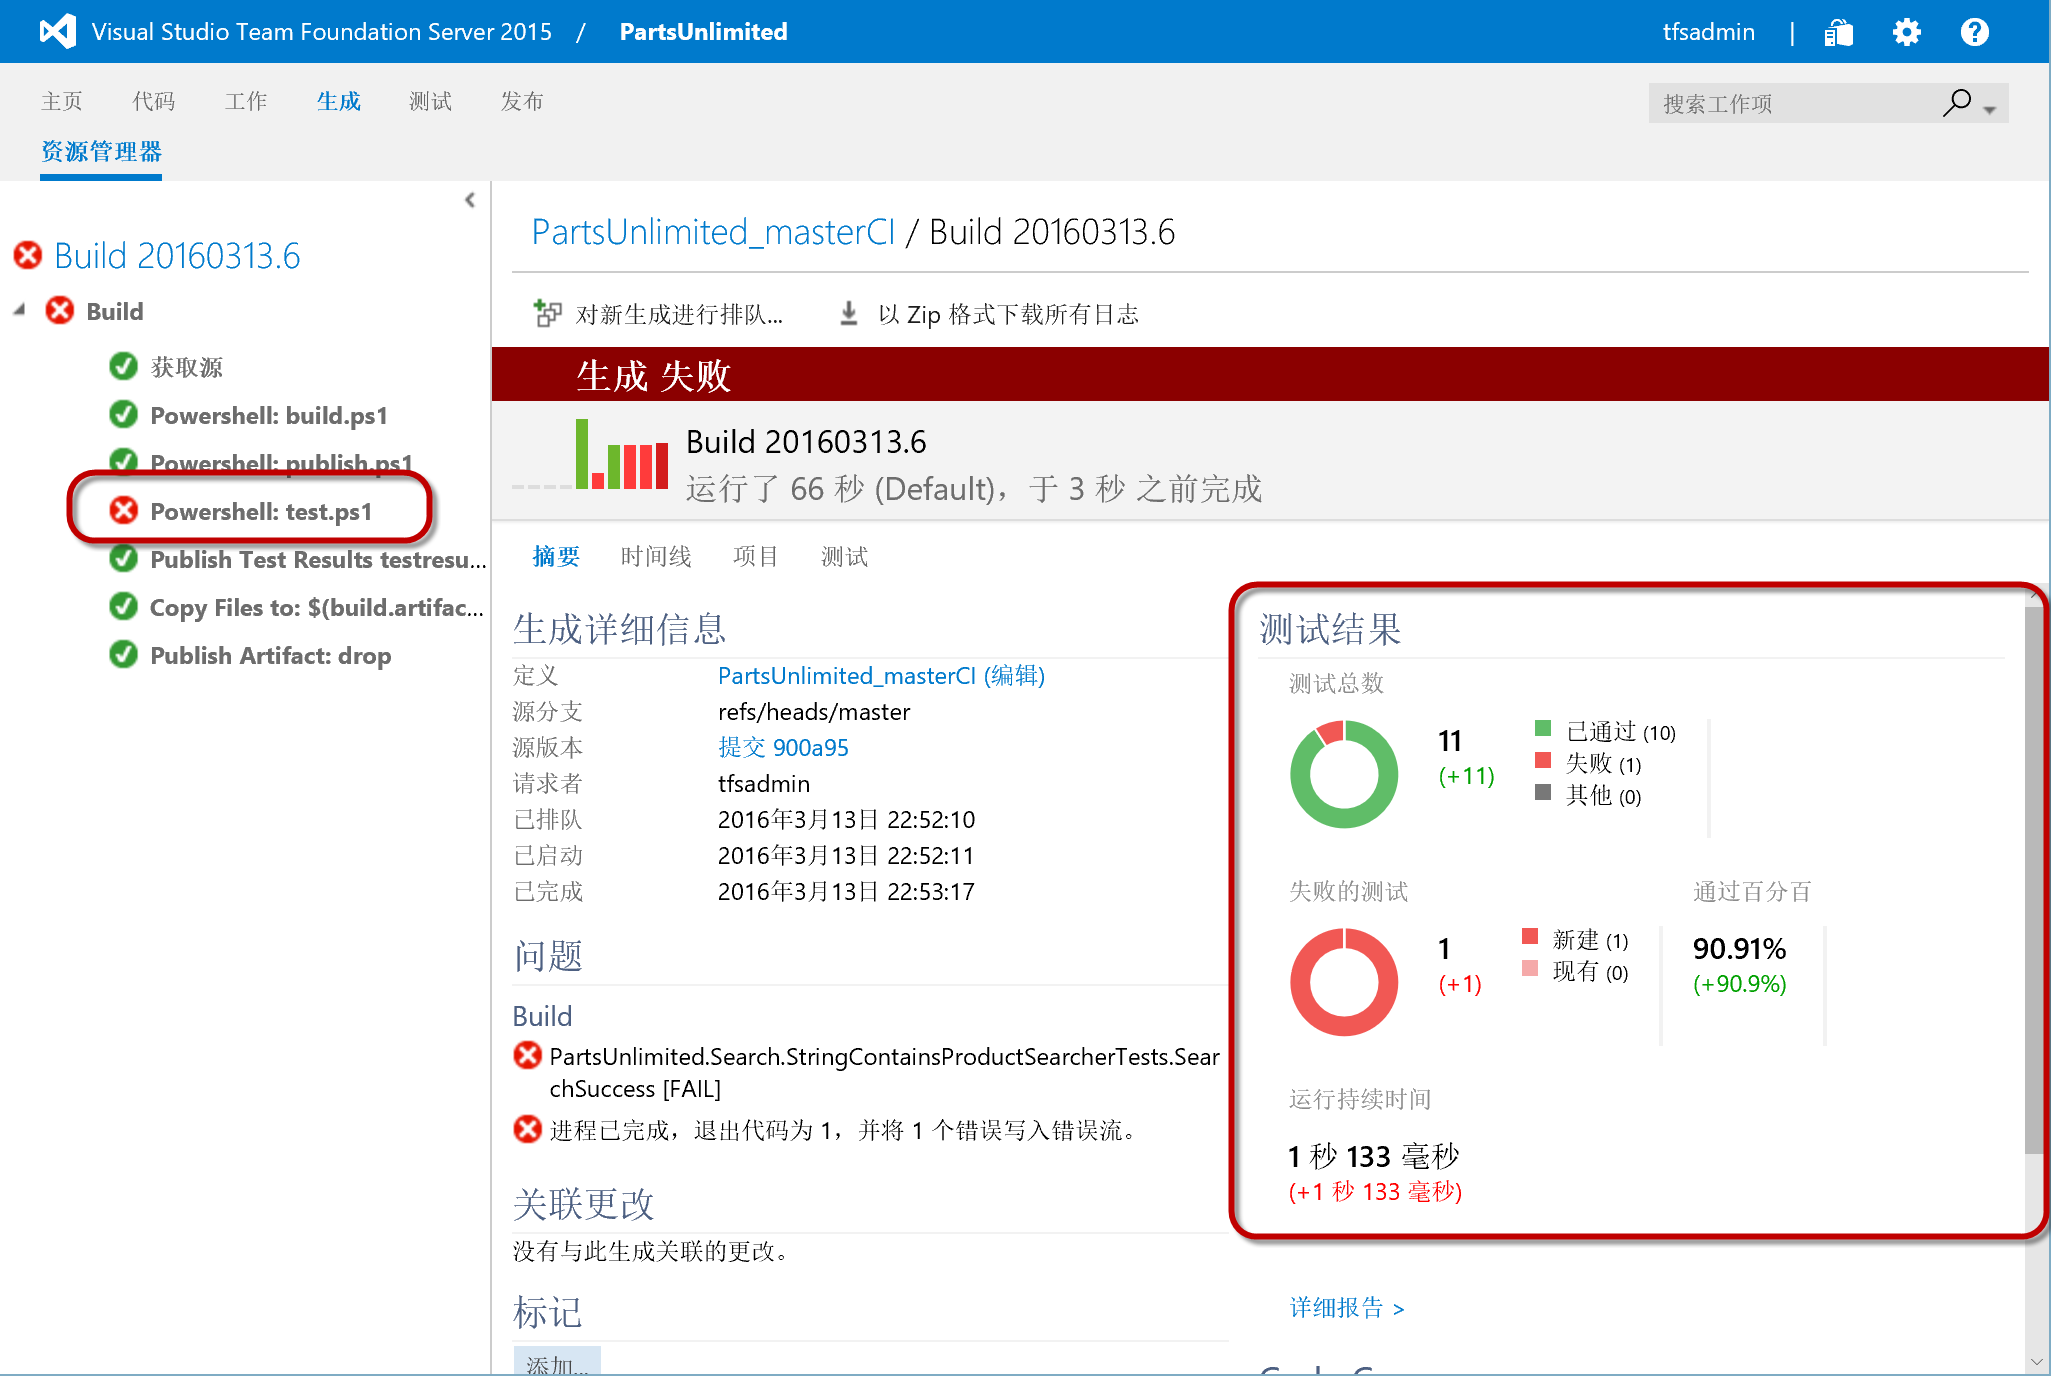
切换至 测试 视图,我们可以看到更加详细的测试结果信息,包括失败测试的详细信息
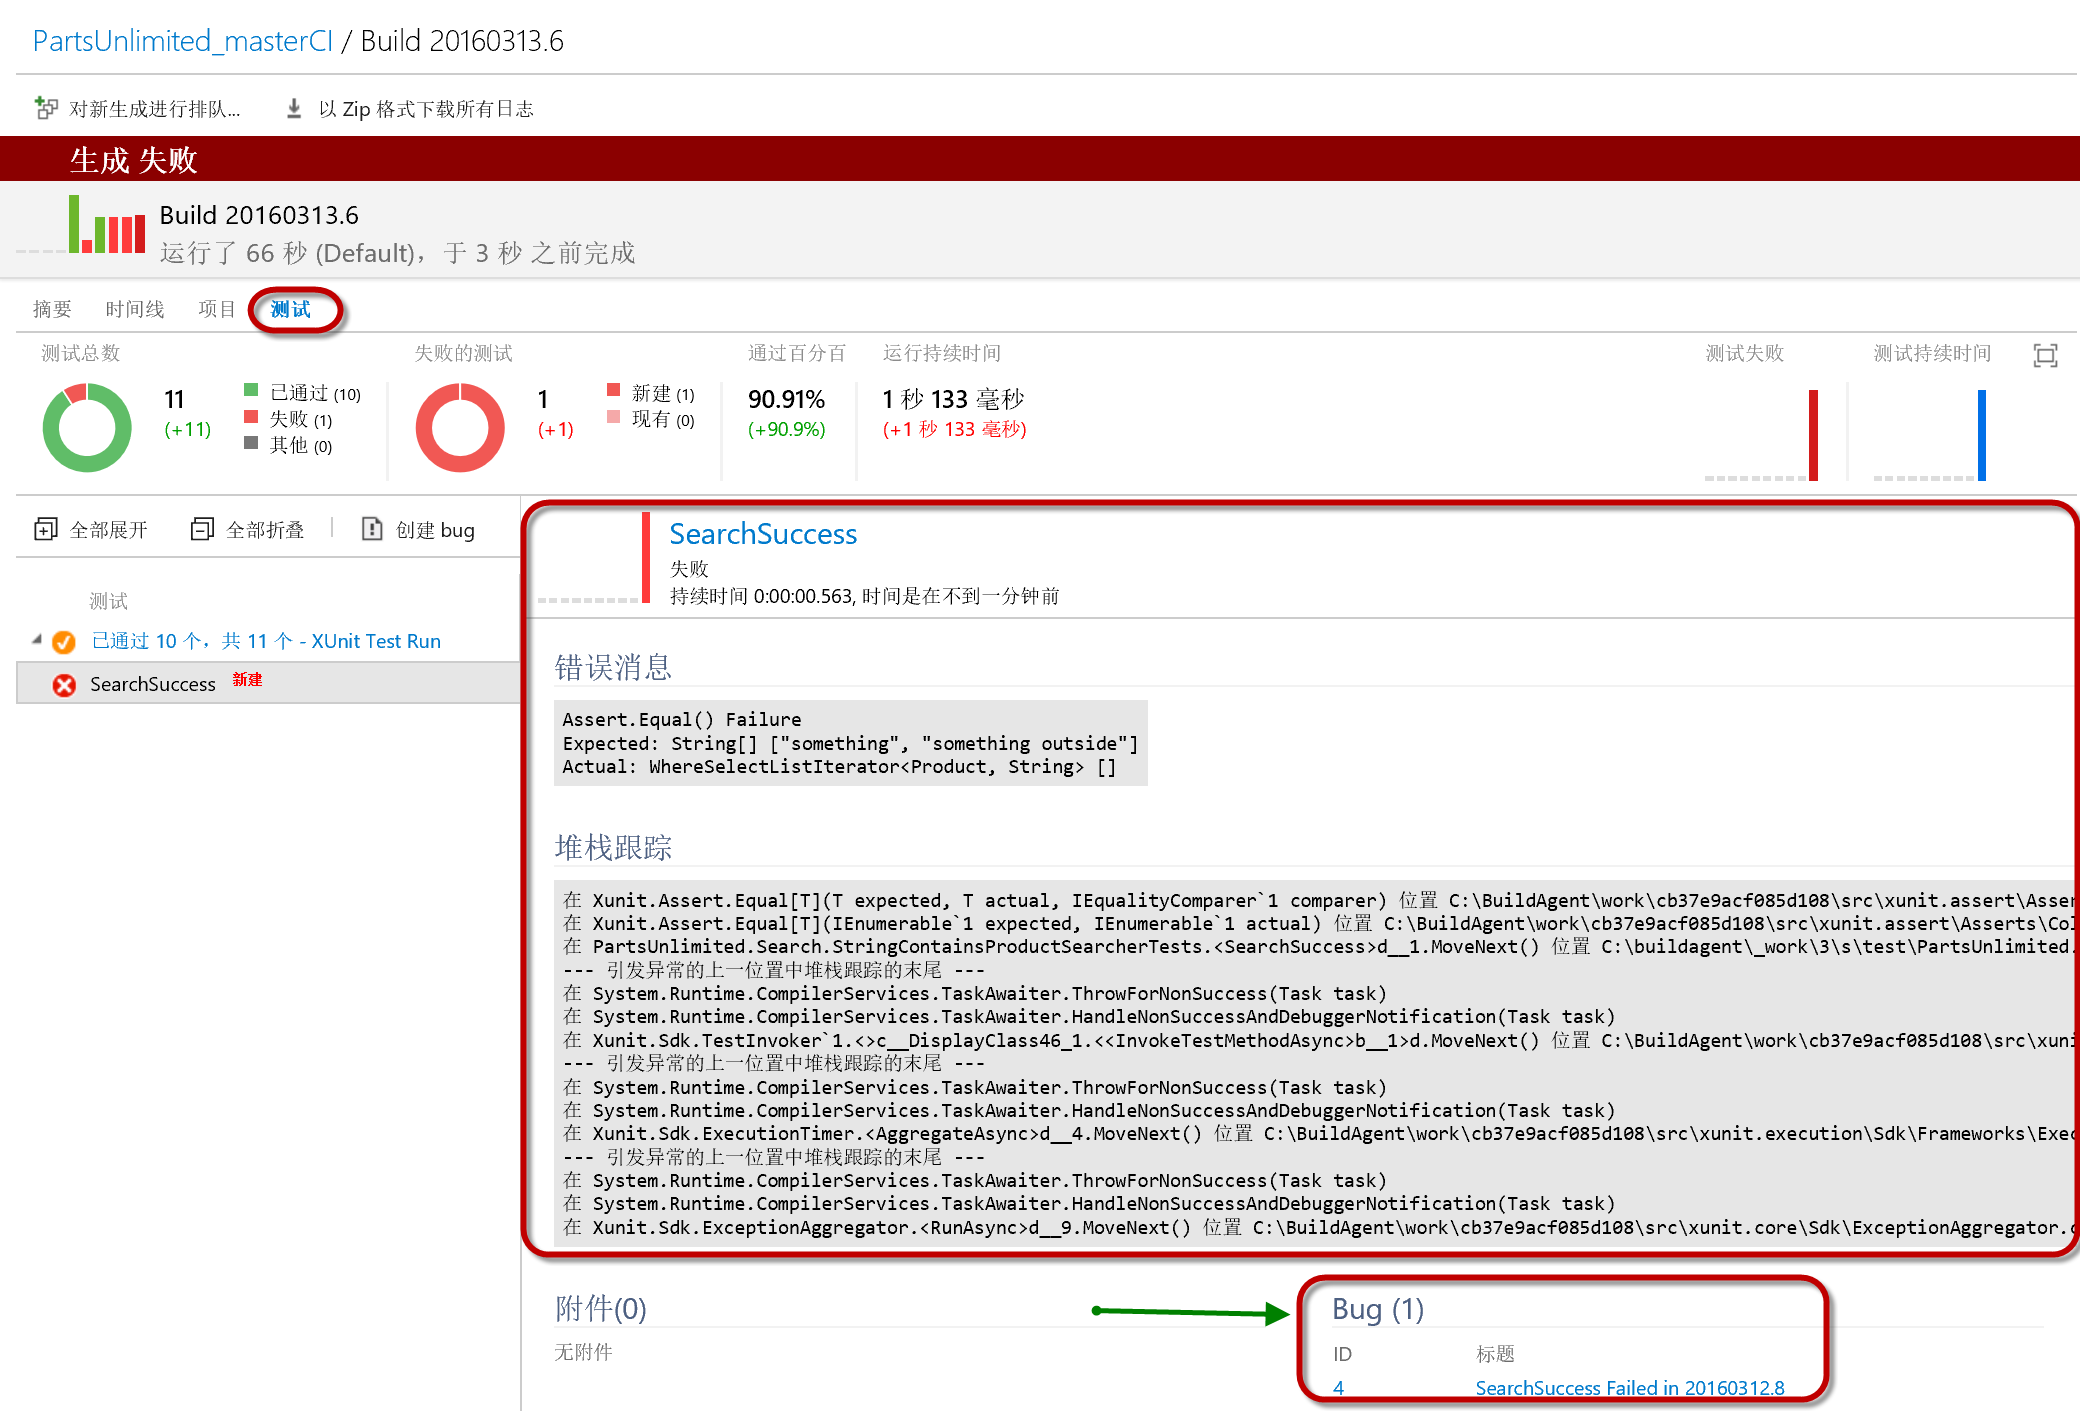
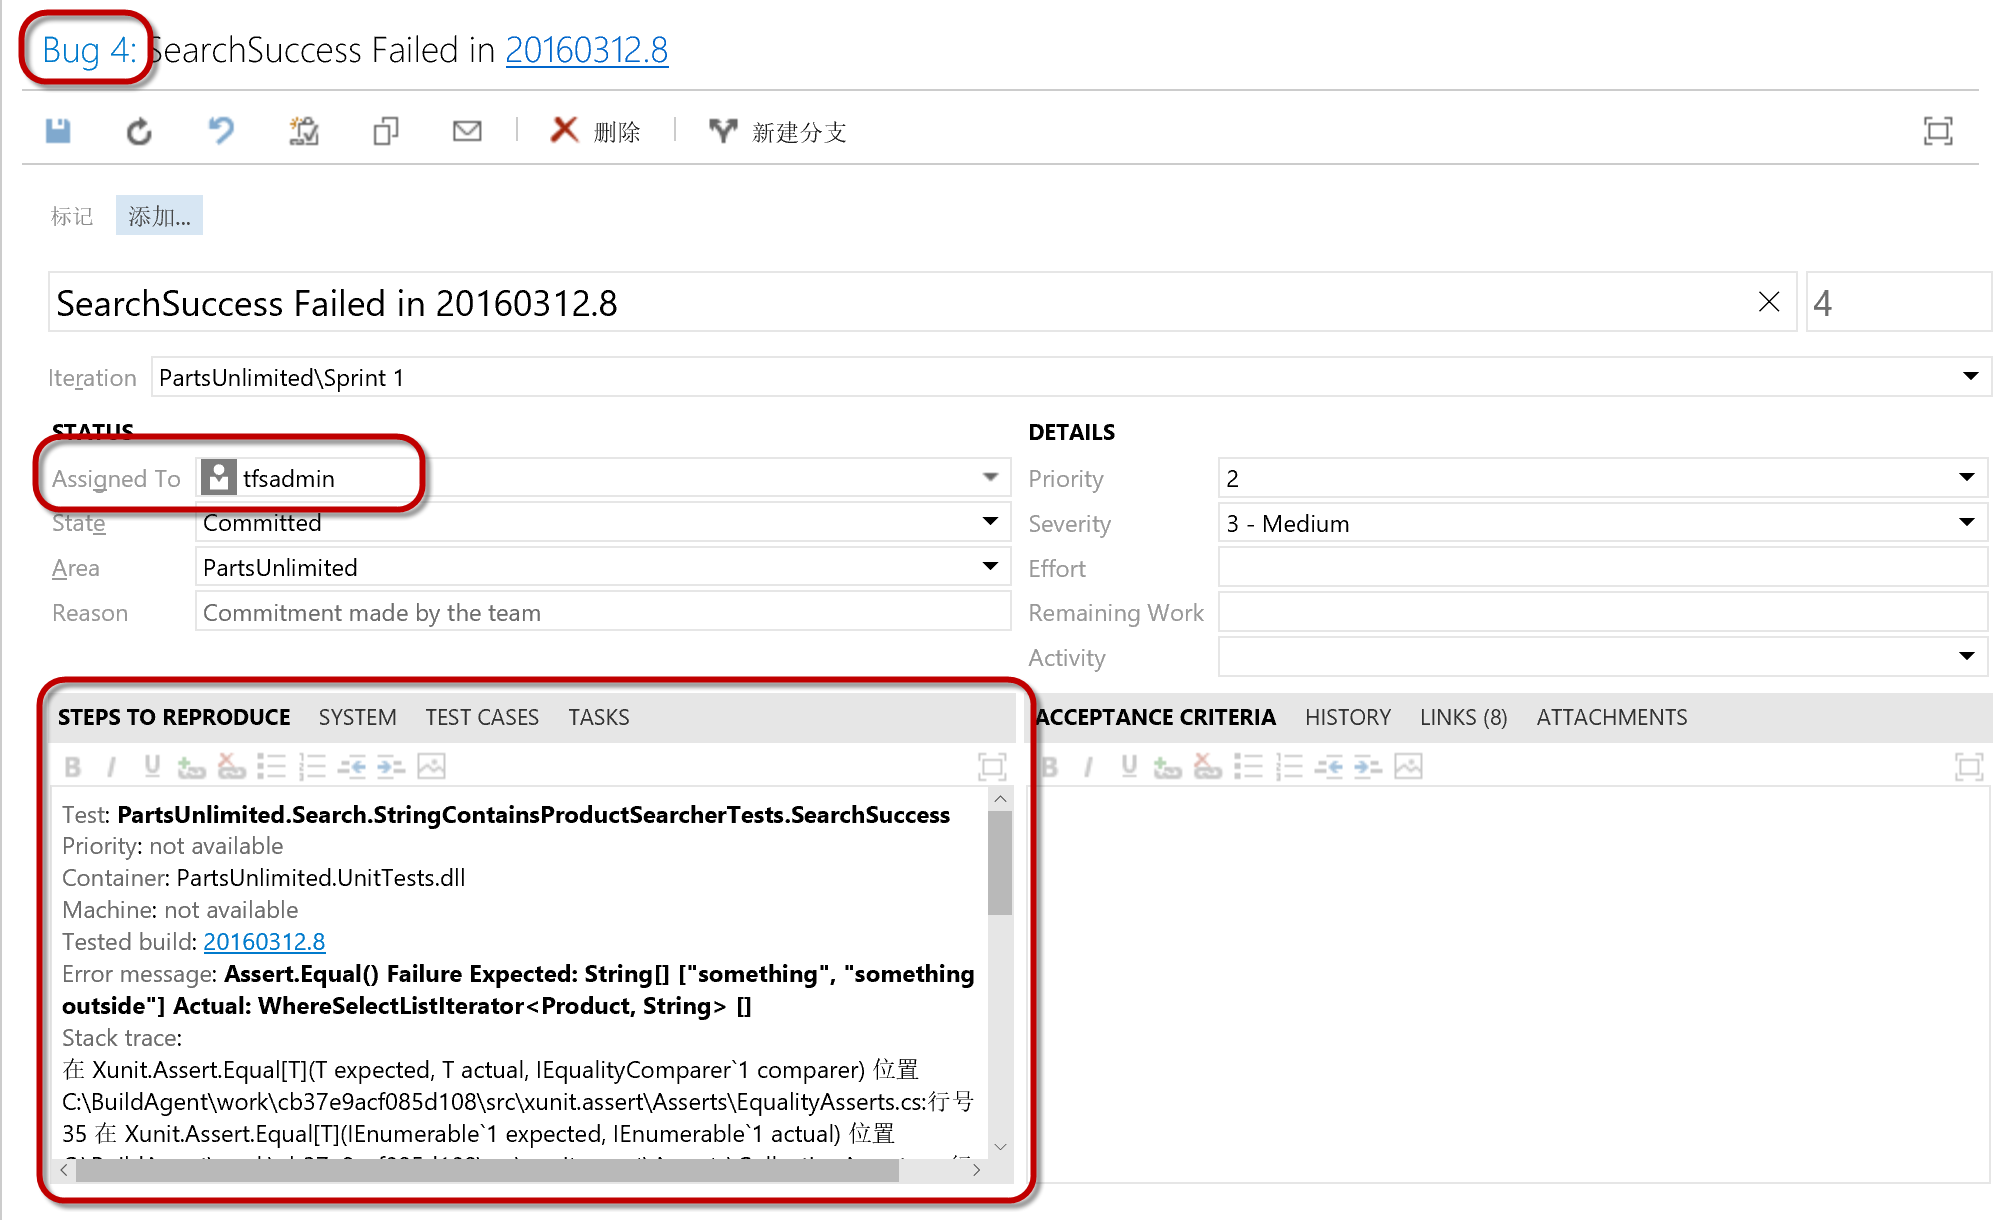
你会注意到,TFS已经为我们创建了一个 bug,点击这个bug我们可以看到这个Bug的 STEP TO REPRODUCE 中详细列出了问题细节,这样开发人员就可以根据这些信息来定位问题,修复BUG。
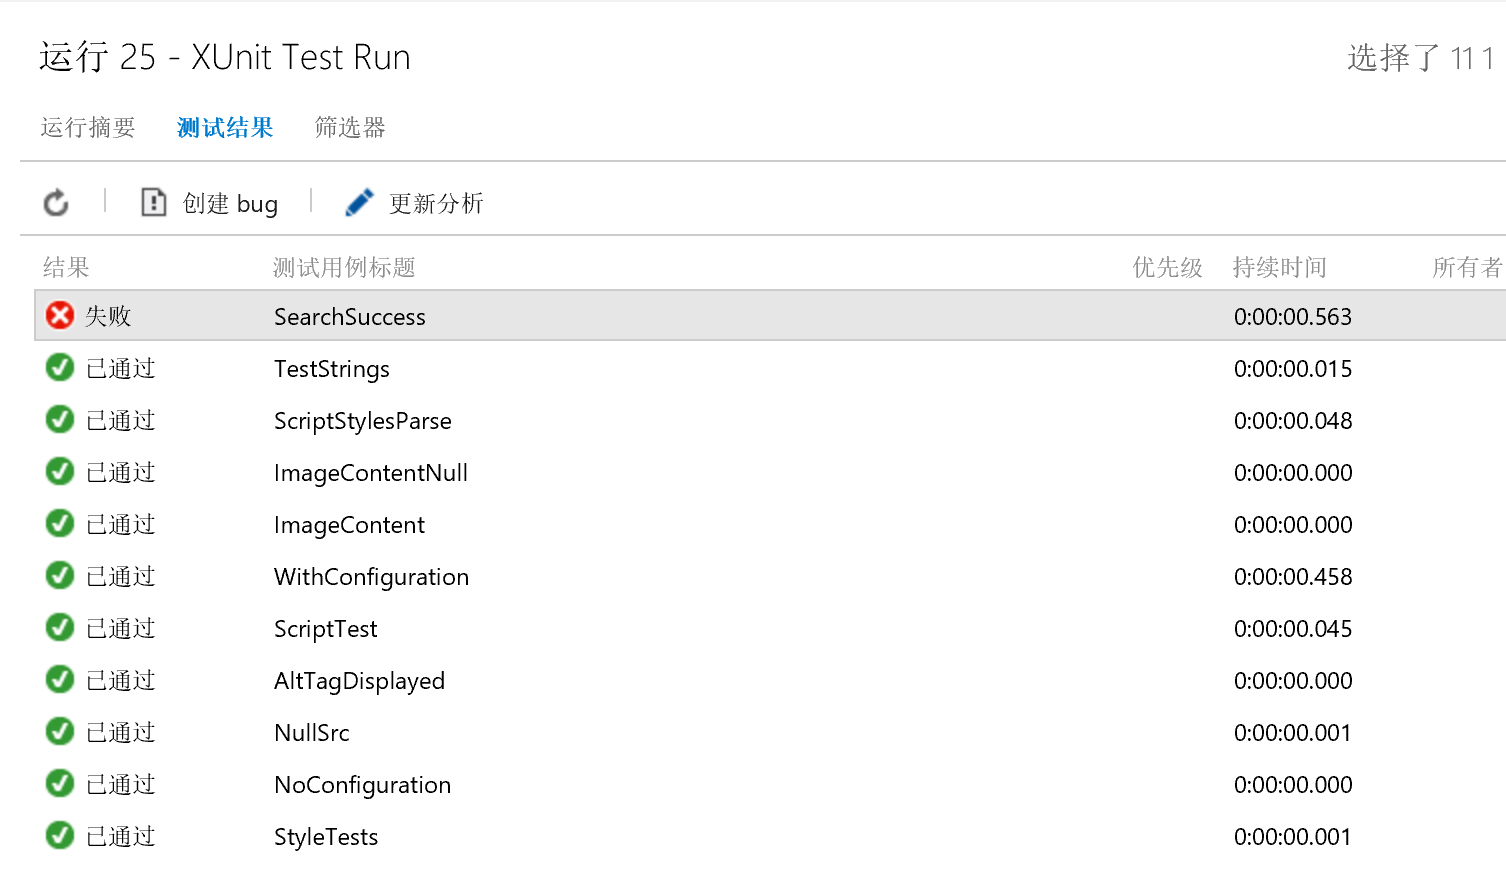
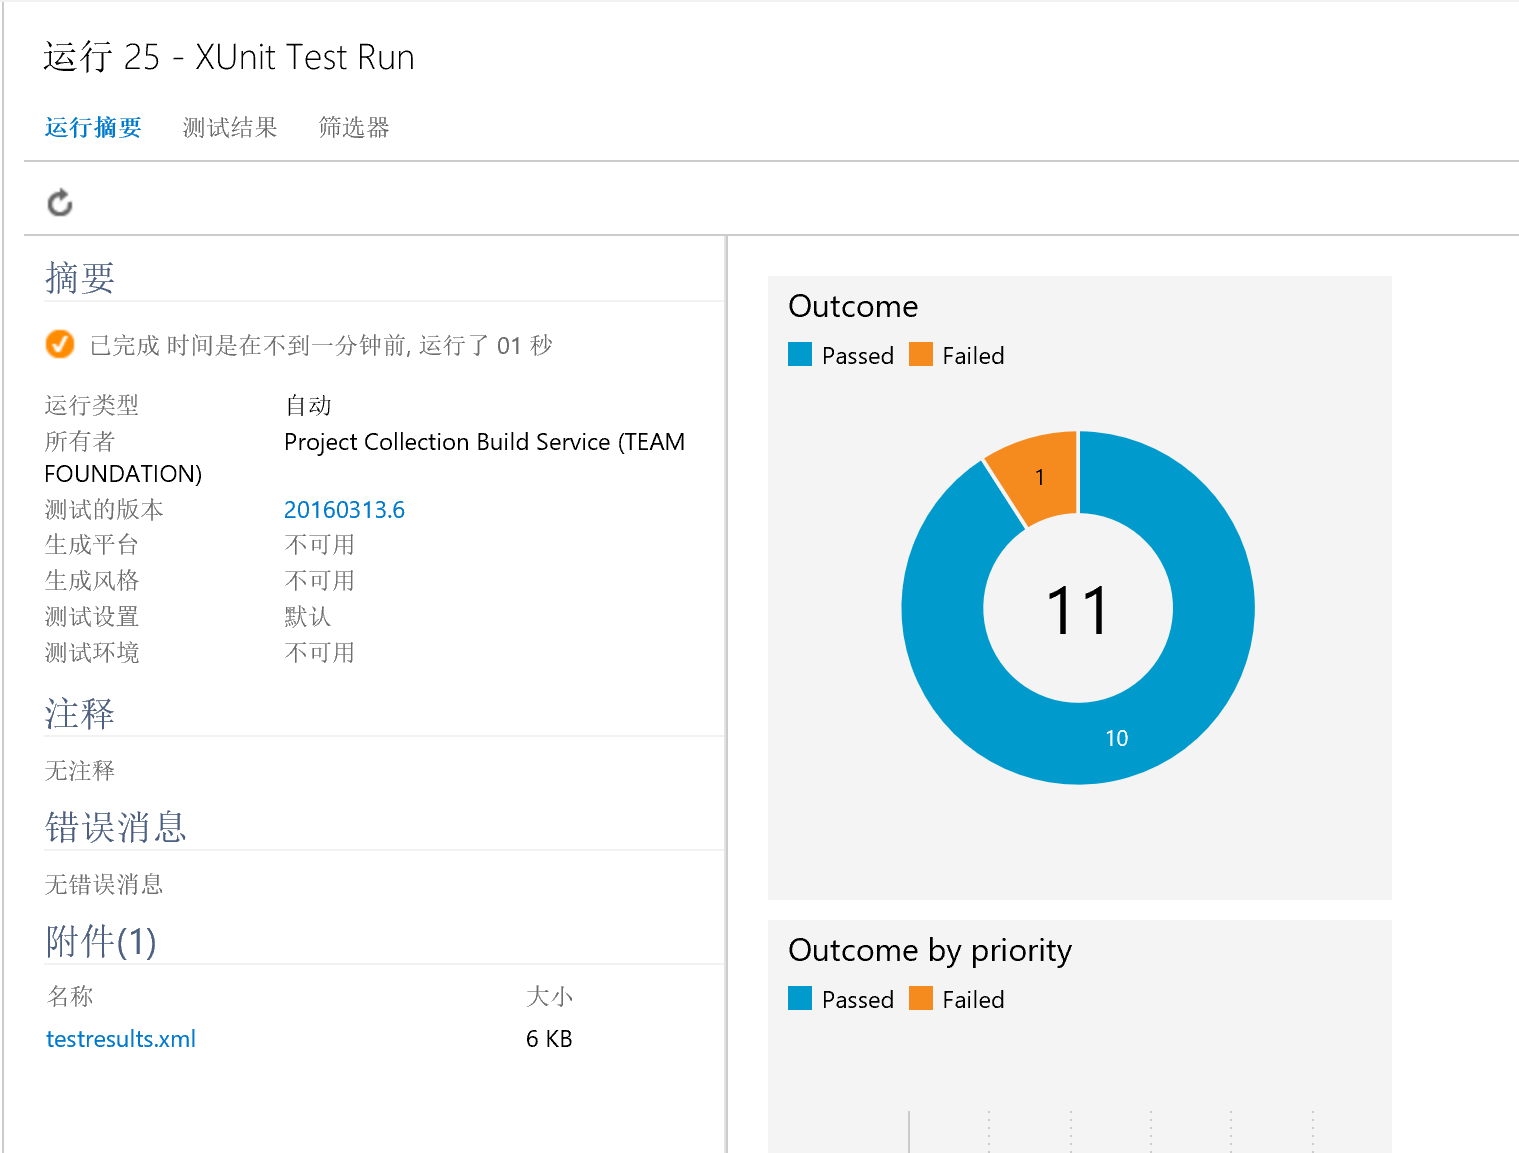
单击测试结果,我们还可以查看更为详细的测试信息,包括每个测试的执行情况和统计信息
运行摘要:
测试结果: